If you’re coming from a Windows PC to a Mac desktop or MacBook, you might be wondering how to take a screenshot without that Print Screen key on your keyboard. Unlike many PCs, you won’t find a “print screen” button on your Mac to capture images of your computer screen. Instead there are multiple keyboard shortcuts you’ll need to memorize to capture that perfect screenshot.
Don't Worry, as there’s a variety of screenshot methods available in the newest version of MacOS — including those for capturing a specific window — all of which produce images you can use for whatever you need.
Here’s a how-to guide for all of your screenshot needs,
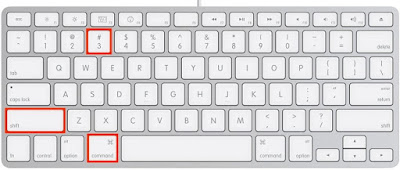
How to take a screenshot of your entire screen
1. Press Shift+Command(⌘)+3.
2. Find the screenshot as a .png file on your desktop.
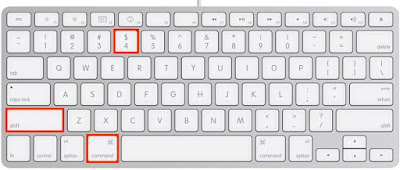
How to take a screenshot of a selected portion of your screen
1. Press Shift+Command+4. The pointer changes to a crosshair.
2. Move the crosshair to where you want to start the screenshot, then drag to select an area. While dragging, you can hold Shift, Option, or Space bar to change the way the selection moves.
3. When you've selected the area you want, release your mouse or trackpad button. To cancel, press the Esc (Escape) key before you release the button.
4. Find the screenshot as a .png file on your desktop.
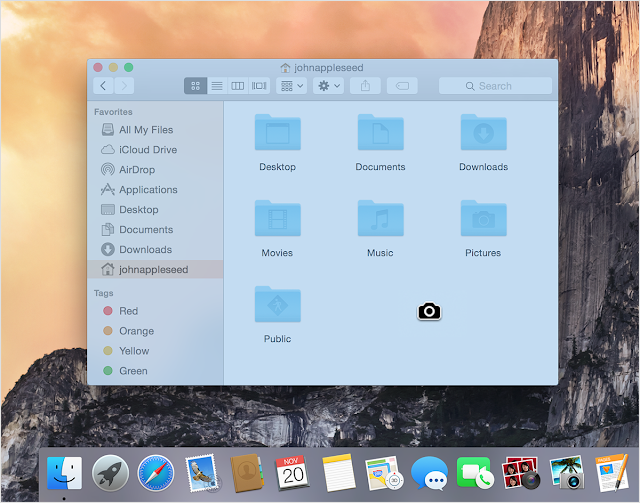
How to take a screenshot of a window
1. Press Shift+Command+4. The pointer changes to a crosshair.
2. Press the Space bar. The pointer changes to a camera.
3. Move the camera over a window to highlight it.
4. Click your mouse or trackpad. To cancel, press the Esc (Escape) key before you click.
5. Find the screenshot as a .png file on your desktop.
How to take a screenshot of a menu
1. Click the menu to reveal its contents.
2. Press Shift+Command+4. The pointer changes to a crosshair.
3. Drag to select the menu.
4. Release your mouse or trackpad button. To cancel, press the Escape (esc) key before you release the button.
4. Find the screenshot as a .png file on your desktop.
These steps capture the contents of a menu, but not its title:
1. Click the menu to reveal its contents.
2. Press Shift+Command+4. The pointer changes to a crosshair.
3. Press the Space bar. The pointer changes to a camera.
4. Move the camera over the menu to highlight it.
5. Click your mouse or trackpad. To cancel, press the Esc (Escape) key before you click.
6. Find the screenshot as a .png file on your desktop.
How to take a screenshot of the Touch Bar
If you have a Mac with a Touch Bar and macOS Sierra 10.12.2 or later:
1. Press Shift+Command+6.
2. Find the screenshot as a .png file on your desktop.
You can also customize the Control Strip region of your Touch Bar to include a Screenshot button. Then tap the Screenshot button to see options for the type of screenshot and where to save it.


